
This easy DIY can add a festive touch to your holiday decor
Happy Holidays we heart this readers! Today, I have an easy DIY project to brighten your home. Even better, you can create two projects with this one DIY. Make a long garland strand to decorate the home, or go shorter and craft a Christmas countdown chain.

When my husband was deployed to Afghanistan for a year, I created a fabric chain to countdown the final month of his mission. Since then we’ve used it to countdown to birthdays, holidays, and numerous business trips.

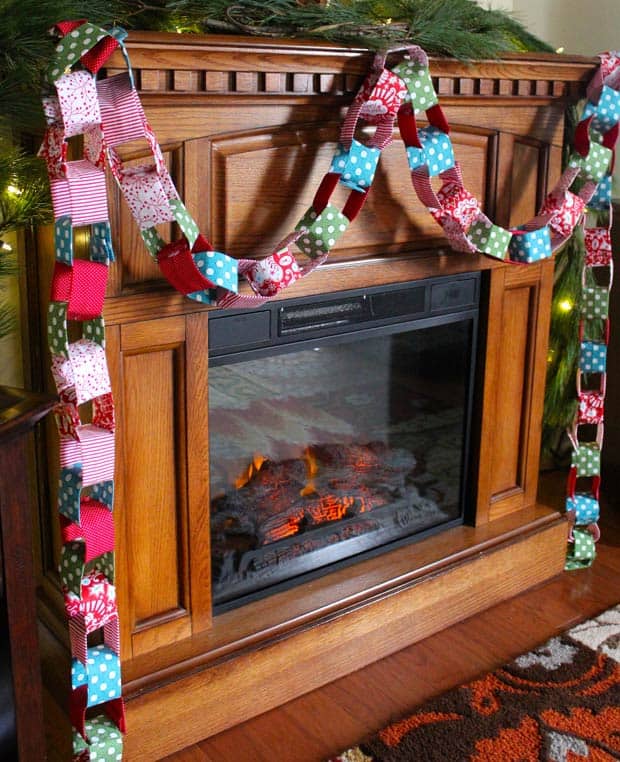
Recently I decided to make an entire fabric chain garland to don our cozy faux fireplace this holiday season. Don’t have the time to sew an entire garland? Why not start a sweet family tradition by creating your own Christmas countdown chain? Let’s get crafting!
DIY Garland Supplies:
(24-link countdown chain supplies in parentheses)

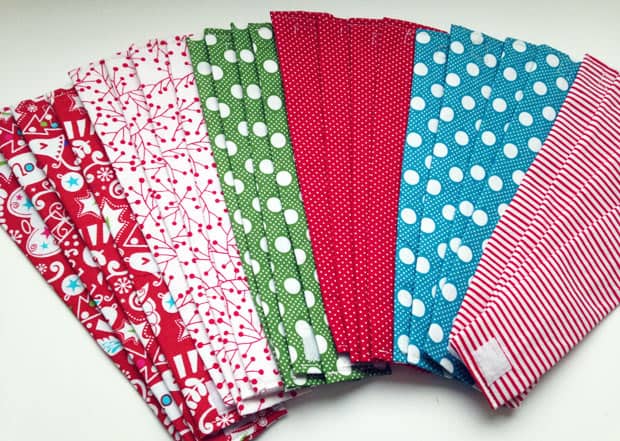
- • Fabric – A variety of 6 different types – 1/2 yard each (1/4 yard each for fabric countdown chain)
• Mid weight fusible interfacing – 3 yards (1.5 yards for countdown chain)
• Scissors or rotary cutter/matt
• Ruler
• Tailoring pencil or chalk
• Sew-on velcro (5/8” wide) – 30 inches (12 inches for countdown chain)
• Thread
• Sewing machine
• Iron

DIY Tip: This photo illustrates the 5 stages of your fabric strips.
Directions:
1. Measure out 4 x 10 inch strips of fabric. If you are making the fabric count-down chain, you will need 4 strips in all 6 fabrics (24 strips total) and interfacing. If you are
creating the longer garland, you will require 12 strips in all 6 fabrics (60 strips total) and interfacing.
2. Iron the fusible interfacing strips onto the back of your fabric strips.

3. Fold your fabric lengthwise. The right sides should be facing one another.

4. Sew a straight line down the length of your strip, allowing a 1/4 inch seam allowance.

5. Turn your sewn strip inside out. (The seam should be in the center of one side of the strip.) Fold in the end 1/4 inch and and sew shut. Repeat with opposite end. Trim threads and press your strips with iron.

6. Cut velcro into 1/2 inch pieces. When dealing with velcro, I find it most efficient to connect both lengths – and then cut into small pieces.

7. Sew velcro onto fabric – one piece to the inside edge (the side with seam), the opposing velcro to the strip’s outside edge.
8. Now the fun part – time to decide on your pattern. Lay out all of your strips (admire your hard work), and play with the sequencing of your fabrics until you are pleased with the order.

9. Attach each link to one another, and hang.

Fireplace mantles, railings, window frames or sills are all great places to decorate with your garland. I hope you will enjoy this playful garland for years to come!
we heartsters – How will you be decorating your home this holiday season?
All photos: Rachel for we heart this
Rachel is a stay-at-home Mom that never seems to be home. She’s a military wife, mother to The Danger Boys and a self-proclaimed craftaholic that enjoys photography, knitting, baking and all things handmade.


